

What to do?!
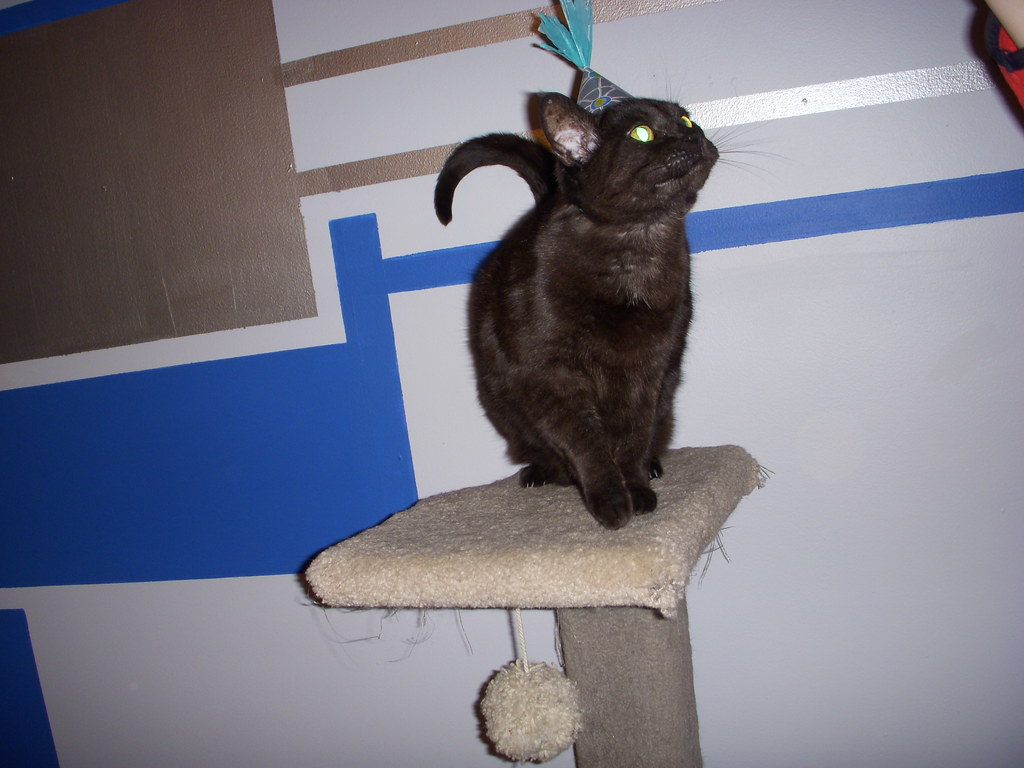
He didn't want a party or a big fuss but I didn't want a completely dull day for him. Luckily, there were 3 kitties in the house who are always looking for a way to show their dad how much they love him, and me, with crafty brains ready to concoct some wacky fun
With that... Kitty party hats were made. And once they were on... all bets were off.
What you need:
Decorative Paper
Plain white paper
Scissors
Raffia or ribbon
Pencil
Glue stick
Round object
Kitties or doggies too I suppose
I'm not going to post all the how to pictures here. For more detail images, go to the Noh Wear kitty cat hat set on flickr
First do a test hat to see if your hat is the size you want. Use the round object to trace a circle on the plain white paper. Cut it out, fold in half then half again. Cut down one of the quarter bends. Twist it into a cone and see if it fits your pet.
You'll actually probably only use half the circle, but I like to test with the full one. If it doesn't fit or you don't like it, find a larger round object to trace and try it again.
Cut two pieces of raffia. One about 3 inches long, the other about 1.5 - 2 feet long. Fold the long one in half and in half again, repeat until it's about 4 inches long. Tie it off in the center using the shorter one. You'll want to use a double or triple knot (this will keep the tassel from pulling through the top of the hat). 
After they're all through, cut at the center bend of each fold. I like to use raffia because the strands can be un-rolled and then torn into long strands creating even more tassels.
You can glue first then try to poke the hole though, but I found that depending on the paper, 3 layers might be too much to get through without wrinkling the hat.)
Find where the second hole should go, opposite of the first. Glue the third square down and poke a hole through it for the other end of the raffia. Feed the other end of the raffia through from outside in. Don't tighten it and don't tie a knot. If for some reason something happened, (kitties might freak out!) you want it to be able to come off easily.
Then find your target. Put the hat on his/her head (I found over-an-ear works best) and the raffia under his chin. Pull the raffia so it tightens up enough to hold but not choke your kitty. I did a simple tie, like the first part of tying your shoes - no knots, before tucking the end under the hat.
Obviously you can see how thrilled they all are.
i can has cake now?
Friday, April 4, 2008
Hats for your lols!



Monday, March 3, 2008
Offbeat Bride
Whether you're getting married or not, take a peek over at Offbeat Bride. Ariel provides great advice for ladies walking down the not so typical aisle. I ended up doing a guest blog there about dreads in weddings.
Wednesday, February 27, 2008
The biggest thing this blog is going to do for me is to make me better document what I've done. I am absolutely horrible at getting good photos of my work. With that I'd love to say I have this stupendous reason for why I've chosen to start where I have, but I don't. The reality is, I didn't want to end up sitting around not doing anything while I attempt to scrounge up some photos of things. These were at hand and I don't have to put my husband out while he's still recovering from last weeks sickness.
So without further ado, my living room!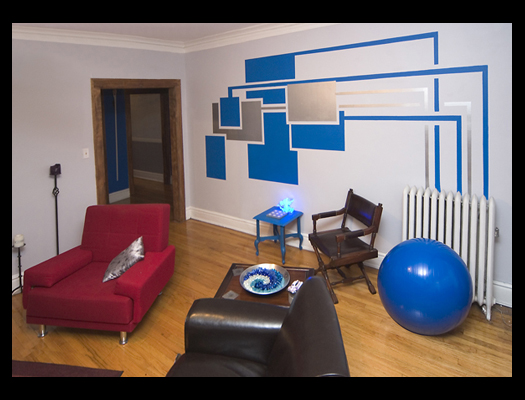
In order to achieve this I started by painting the entire room a soft light gray. Next I taped off the squares that I wanted, noting which ones should be which color and then taped off the circuit lines to them from the radiator. The blue is this fantastic latex paint I got at Home Depot and the silver is meant to be a wash paint that I used as a solid. Surprisingly the blue turned out to be the exact same color as the painters tape. I had a junky old table that had been painted an awful "woodish" brown that didn't match anything in my home so I painted it the same blue to match the walls.
The silver pillows on the red couch and chair I made using a silk brocade my parents brought back from China. The bowl on the end table is a silver hammered shallow bowl from Ikea. I filled it by placing glass rocks of blues and whites both clear and frosted into a swirl pattern, again to create a watery movement as a feature in the room. The drapes are white cotton from Ikea which I have future plans to attempt a dye project on. For lighting, yes, we really do use black lights as uplights behind the curtains. From outside it's a bizarre spooky look, but inside it's actually rather peaceful and isn't that harsh at all because of the way the curtains soften it and when regular lights are on they just create a simple soft hue.
And there you have it. Our beautiful living room which has already changed significantly but I'll show you updated photos once I finish getting all the new furniture sorted out, books put in their proper place and other such things.
Tuesday, February 26, 2008
Welcome!
Here it is. The official start of the Nohwear blog. With any luck I'll be able to update this blog as much as I do my personal LJ. So what exactly is the Nohwear blog all about? I'm creatively schizophrenic which results in a constantly messy home and too many things I've made. Luckily none of this kept my husband from marrying me, lucky for me that is, probably unlucky for him. Nohwear is about my projects, new and old, coming and going. It's what I do and who I am.
To begin with I'm going to be reviewing some of my past projects. So check back and maybe you'll see something you want to try or you'll want me to try.
So welcome. Make stuff. Know your wears.
Cheers!
Siouxzi

 Posts

