
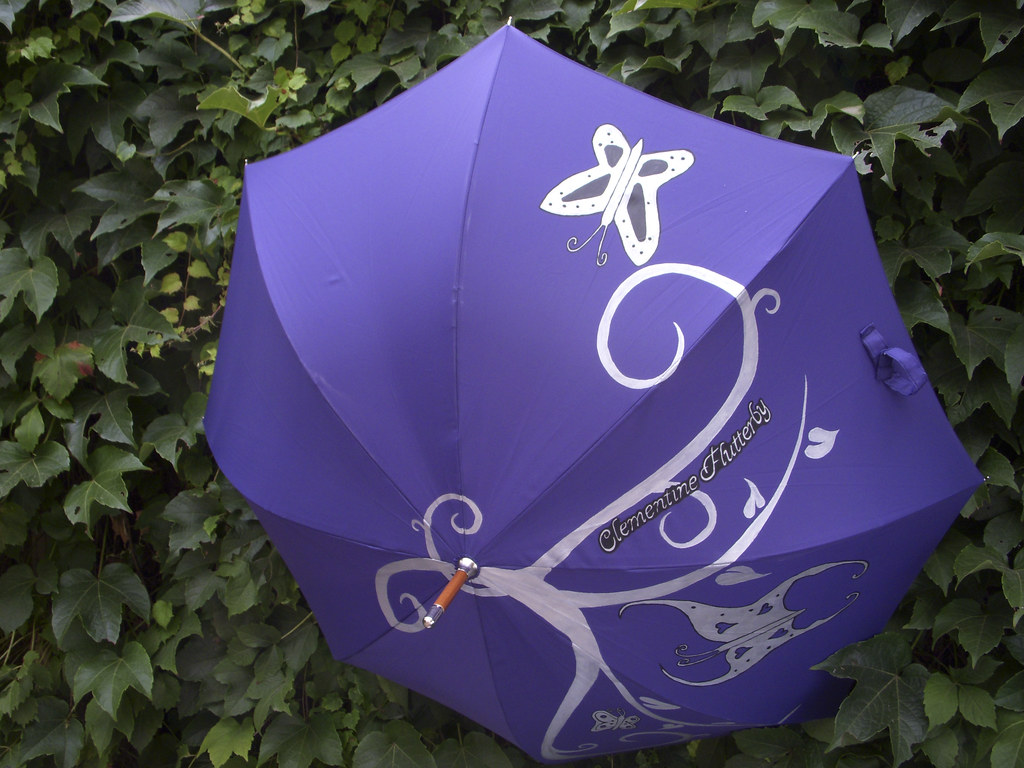
 This umbrella was an incredible challenge. The request was silver butterflies on a purple umbrella with the phrase "Clementine Flutterby". I had planned on just three butterflies similar to the bats, but it seemed too simple for a girl who hasn't seen rain in far too long. So, I started working around the idea of swirls and vines partly for a design that will be coming in a bit. As I worked through the design, it seemed a little flat. Other designs I've wanted to be this way but this needed some depth added to it. So I went for a simple black outline and detail to the butterflies.
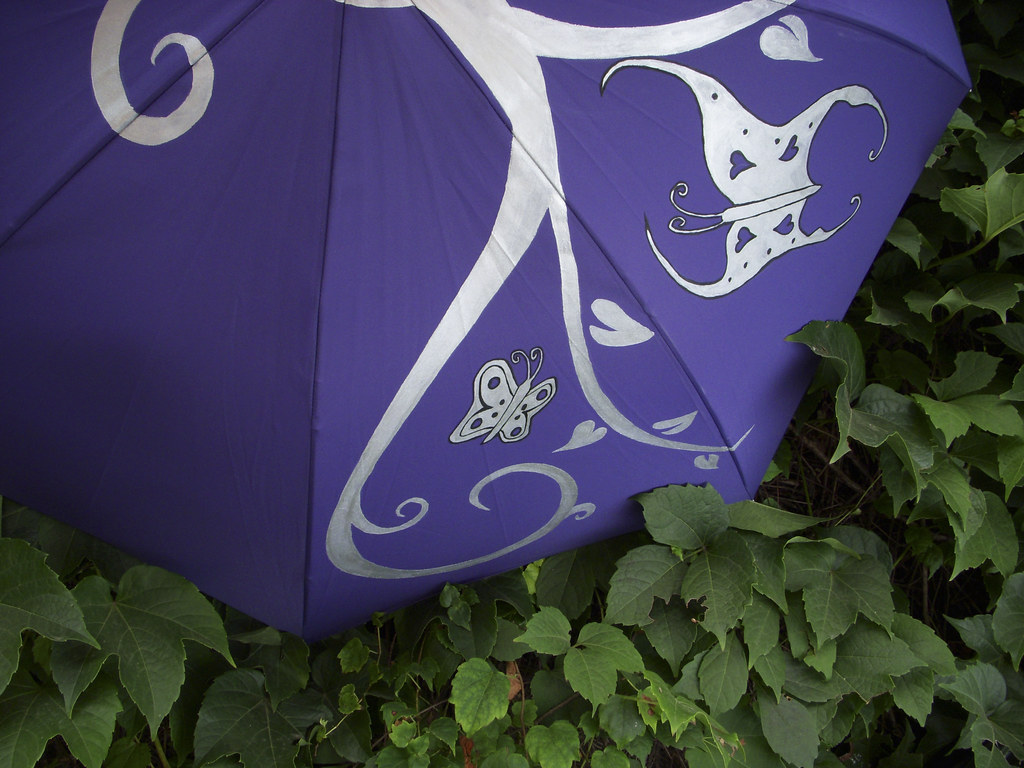 The last of the difficult part was the phrase. Trying to find the right font, cutting it out for the template, painting and then outlining it all took an incredible amount of time. But the end result is positively delightful. I hope the person it was made for really enjoys it.
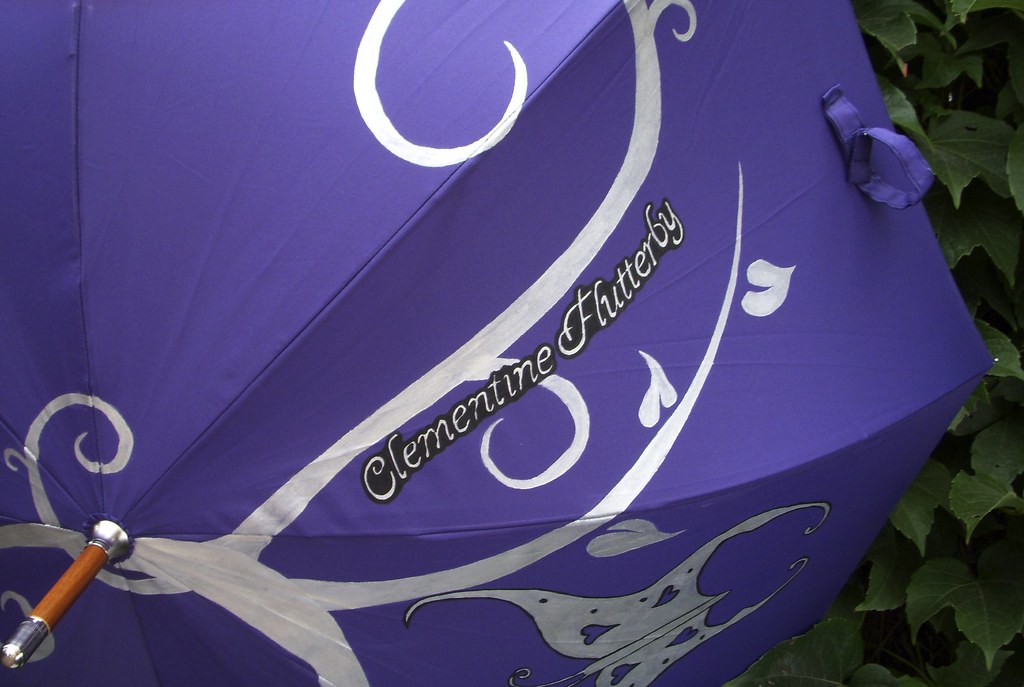 As always, click on the pictures to go to our Flickr and see more details and other umbrellas that have been made. And, if you want a Pop Brolly for yourself or someone you want to surprise, just check out the Nohwear Etsy Shop where you can buy already made umbrellas or have one custom made for you.
Monday, September 1, 2008
Pop Brollies - Butterfly Swirls Umbrella
Pop Brollies - Silver Bats Umbrella
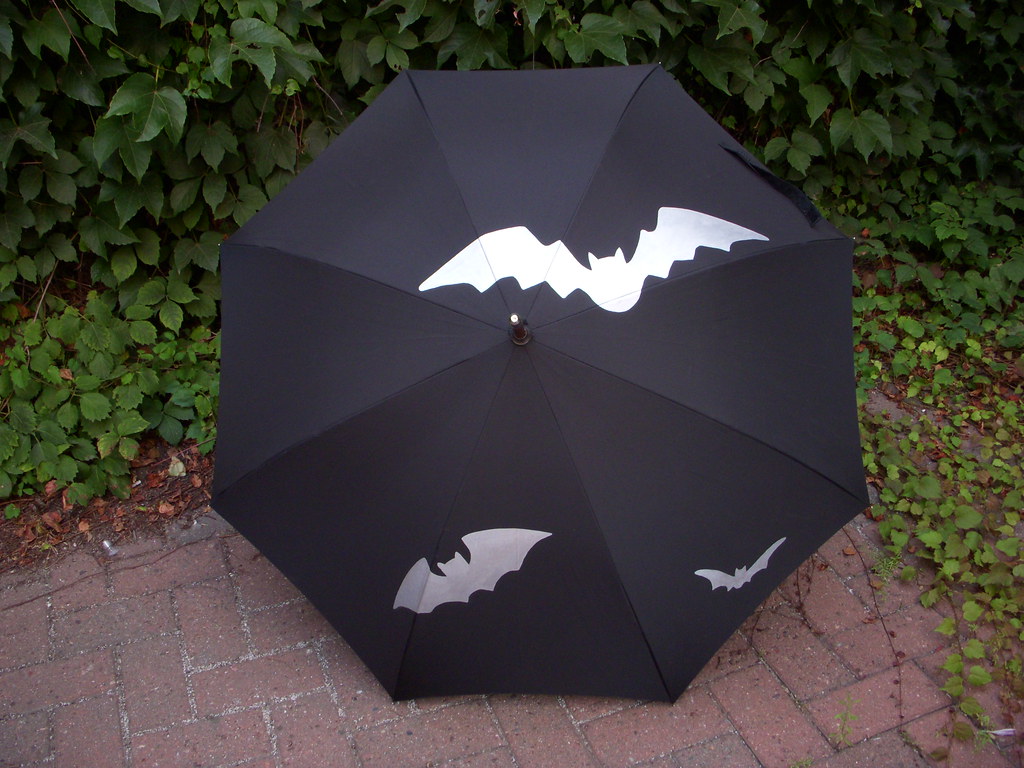 I took the black on purple Bats in the Belfry design and did it in my favorite color combo, silver on black. It translates beautifully. I'm especially impressed with the way it looks from under it. How much fun to enjoy your umbrella as much as everyone around you will!
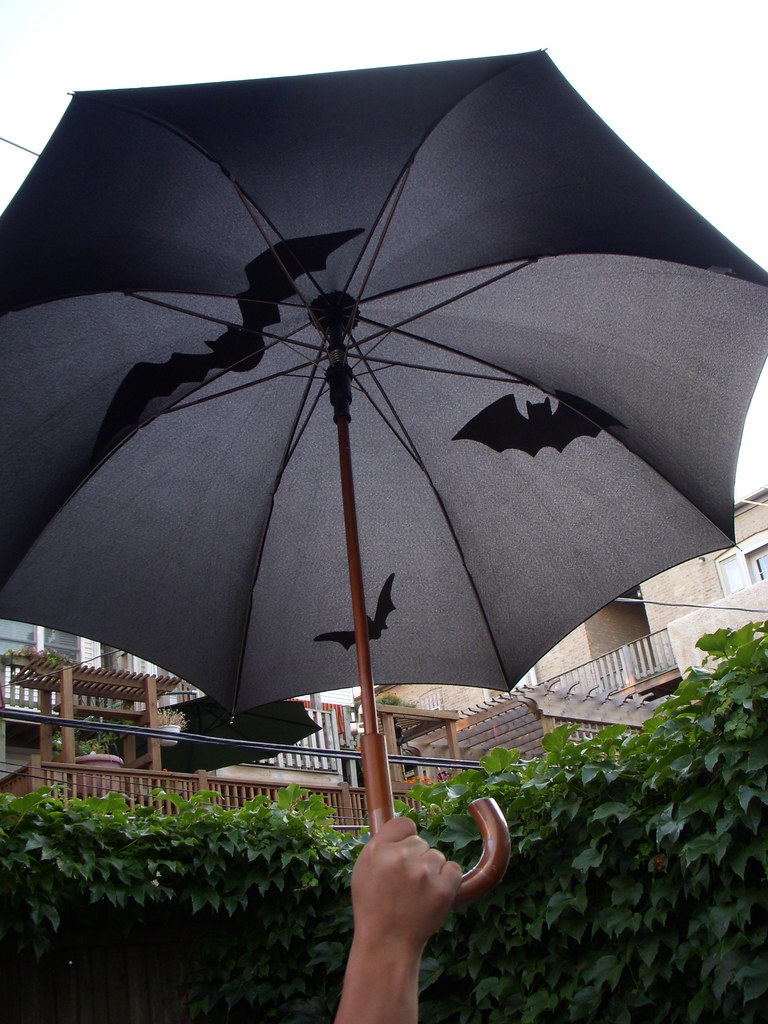
We also discovered (thanks to Elaine's fantastic eye) that our backyard makes a gorgeous backdrop for photographing all my hard work. I love the brick, vines, fence, and flowers out there. Luckily the two cars that park there haven't been around every time we've gone out to shoot.
Anyway. So here's the latest of the brollies. Hope you enjoy, and of course, you can pick one up over at the Nohwear Etsy Shop
Monday, August 25, 2008
Design Ideas!
Well, It's been busy over in Nohwear land. Trying to clean out the studio a bit so I have more room for drying brollies. No complaints mind you but it does impact the speed in this one woman show. Since I've got a few minutes before hitting the hay for another day of Pop Brolly production though, I thought I'd throw out a post listing some ideas I'd love to make as well as to open it up to you wonderful people to tell me what you'd like to see done as well.
So here's a starting list of custom pieces I hope come my way.
1: Steampunk brollies. Yes, we all know with my Steampunk Wedding, of course I'd want to do this. It's an idea I'm still chewing on. I'm growing tired of simple gear prints on stuff and it being steampunk. I want it to go further and be better than just that. I half think some sort of clock face where the brolly looks like a decaying time piece. That's a lot of work but it would be such a fantastic challenge.
2: Nautical is fun a great tentacle or two or three reaching up from the depts of Davey Jones' locker. That'd be fun.
3: Zombie arms. I have one light colored umbrella in my possession. I desperately want this to look like a window with the shadowed outlines of zombie arms clawing at it. Think Dawn of the Dead or Shawn of the Dead when they're trying to break into the Winchester.
3: R2D2, C3P0, Boba Fett, Darth Vader. Wouldn't it be fun to make a series of brollies that look like their heads!
That's all for now, now you do your jobs, tell me what YOU want to see!
Thursday, August 7, 2008
Pop Brollies - City of Villains: Ghost Widow Umbrella
Another day, another game-inspired custom Pop Brolly!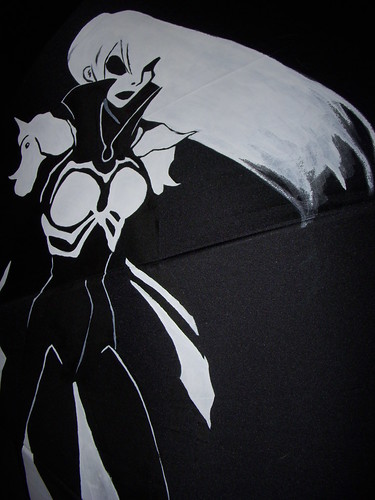 By far the hardest umbrella I've done thus far. I haven't played City of Villains at all, so when a request came in for an umbrella for the game I was a bit scared. It's always hard creating something based off of a wildly popular anything. Then when I was sent the reference material I nearly squeed, I chose this version of the Widow character, there are so many, because of the great lines and contrast against the umbrella.
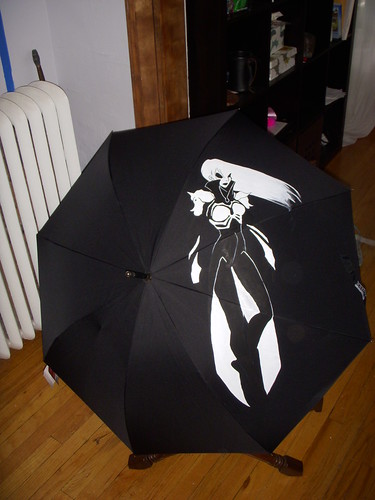 Ghost Widow is an incredible design at over 20" tall. She's not quite done yet, I've a bit more detail to add to the hair and some gray to outline her as the black of her outfit isn't holding quite the contrast that I wanted. Still I think this one is really going to impress when it's used.
I am currently developing the first line of Pop Brollies, check back soon for the official announcement. Custom designs are made on request. Please contact me either here or through my etsy account
Pop Brollies - Dalek Umbrella
Exterminate, Annihilate, Destroy! 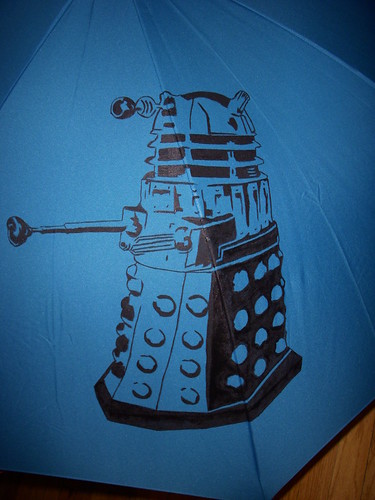 The return of Doctor Who has made one of my good friends, David B happier than Charlie when he first walked into the chocolate factory. As such, I had to make him a Doctor Who umbrella, but not just any old one, it had to be a Dalek. I can't wait till he sees this tomorrow. Neither can he.
I am currently developing the first line of Pop Brollies, check back soon for the official announcement. Custom designs are made on request. Please contact me either here or through my etsy account
Pop Brollies - the Sims Umbrella
Video games are so frakkin popular!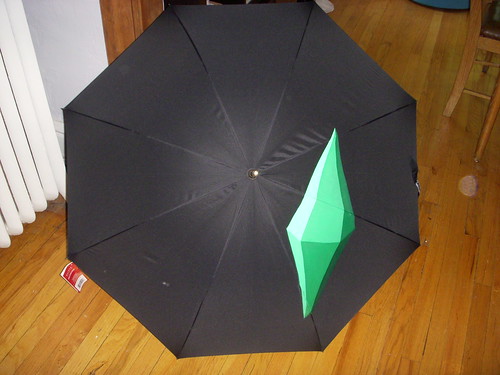 This custom brolly is, yes, the Sims character icon nice and big right over your head. Are you playing the game or is it playing you? How much fun to possibly do a thought bubble next time...
I am currently developing the first line of Pop Brollies, check back soon for the official announcement. Custom designs are made on request. Please contact me either here or through my etsy account
Pop Brollies - Asteroids Umbrellas
Another 80's theme Rockin!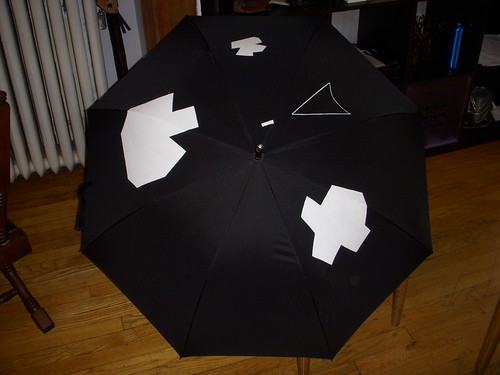 My adaptation of one of my favorite games growing up. I find all of these so much fun to do for the double meaning of them. The umbrella shape itself is so much an echo of the asteroids in the game to have them being shot up by the one out of place item. It gets deep in here people. I'll spare you going into the deeper meaning of the space invaders :D
I am currently developing the first line of Pop Brollies, check back soon for the official announcement. Custom designs are made on request. Please contact me either here or through my etsy account
Pop Brollies - Bats in the Belfry Umbrella
Two of my favorites!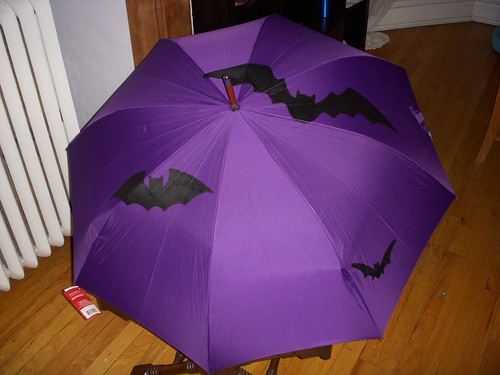 This first version of Bats in the Belfry was created for most chipper of all Chicago Goths, Jamey B. However, someone saw it and asked very nicely if he could buy it instead. Jamey being the awesome neighbor that she is said sure.
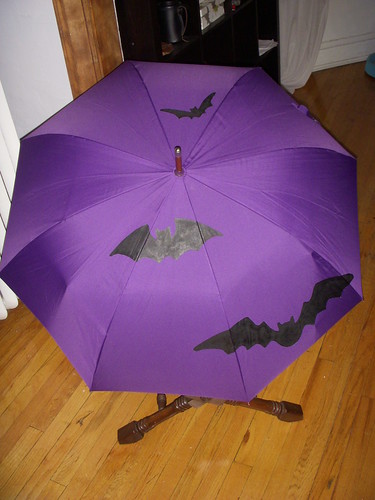 And so, I made her a new one. In real life, the design is a bit more subtle. The umbrellas are not quite as bright as they appear in the photos and the black pulls a nice undertone out of the purple. It's still bold and noticeable as you walk down the street, it just takes an extra look to fully appreciate what you're seeing.
I am currently developing the first line of Pop Brollies, check back soon for the official announcement. Custom designs are made on request. Please contact me either here or through my etsy account
Pop Brollies - Space Invader Umbrella
 I wouldn't be a child of the 80's without an awesome Space Invaders design. This one was a test and I love it. With a little revamp, it will be available on Etsy shortly. I'm pretty excited over it. I love space invaders and had been thinking of doing this one for a while now.
I am currently developing the first line of Pop Brollies, check back soon for the official announcement. Custom designs are made on request. Please contact me either here or through my etsy account
Pop Brollies - Captain America Umbrella
 Who doesn't need a Captain America Shield umbrella. Made for Patrick Brower of Challenger Comics fame for his birthday. This one is exquisite. Truly will remain one of the best I create. Although I'll be honest... too much ink makes things become a bit more difficult. I do have to investigate more possibilities on how to handle some designs.
I am currently developing the first line of Pop Brollies, check back soon for the official announcement. Custom designs are made on request. Please contact me either here or through my etsy account
Tuesday, July 1, 2008
Pop Brollies - Bombs Away Umbrella
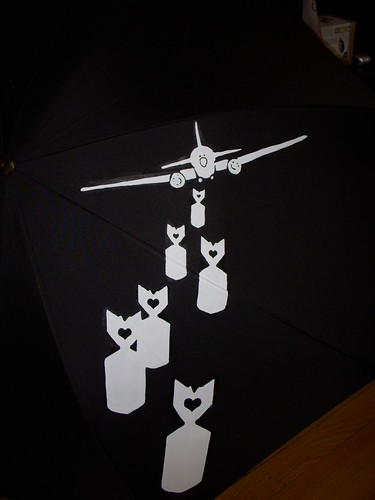 Finally it's done! Bombs Away, which I've been waiting to show everyone for a while now. It'll be shipped off and out of my hands in a couple days. Made for the genius behind the Cyberoptix Tie Lab, Bethany Shorb as a thank you for doing our wedding ties. I've loved the design for a while and was thrilled when she let me use it to make this for her. It quintessentially captures what I hoped for these umbrellas. A great bold design that really engages and will completely dazzle in a see of black umbrellas. Be sure to check out the closeups
I am currently developing the first line of Pop Brollies, check back soon for the official announcement. Custom designs are made on request. Please contact me either here or through my etsy account
Monday, June 30, 2008
Pop Brollies - The Lusties St. Michael Umbrella
So I've actually been busy. Not doing piddly little stuff and avoiding all the projects I dream up, but actually busy, creating stuff. Whodda thought right? So what have I been making? I've been painting umbrellas. I've been lusting for some great oversized prints. I want big bold graphics that smack people in the face not because you're unable to control your umbrella in the high Chicago winds, but because the designs are just that great. Which brings me to...  First was the St. Michael Lusties umbrella. Made for my friend St. Michael who plays, you guessed it, in the Lusties. Crazy isn't it. This is a 48" wide black umbrella handpainted in 5 colors.
And here's the other side of it You can't even imagine how hard it was to do this logo, but I love it. It has a faint shimmer to the name thanks to the opalescent ink.
It goes a little mainstream as an idea but I wanted to help promote the band for him.
I am currently developing the first line of Pop Brollies, check back soon for the official announcement. Custom designs are made on request. Please contact me either here or through my etsy account
Friday, April 4, 2008
Hats for your lols!
 It was my husband's birth month. I spoiled him for two weeks leading up to his birthday with ninja toys, robot toys and tokidoki tees and then on his actual birthday, I realized, I was short 1 gift. Actually, I wasn't, the ninja suit just hadn't arrived yet.
What to do?!
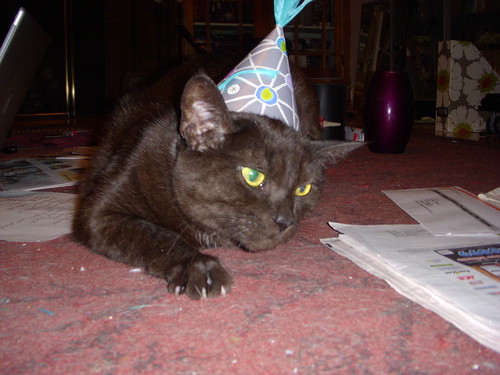
He didn't want a party or a big fuss but I didn't want a completely dull day for him. Luckily, there were 3 kitties in the house who are always looking for a way to show their dad how much they love him, and me, with crafty brains ready to concoct some wacky fun
With that... Kitty party hats were made. And once they were on... all bets were off.
What you need:
Decorative Paper
Plain white paper
Scissors
Raffia or ribbon
Pencil
Glue stick
Round object
Kitties or doggies too I suppose
I'm not going to post all the how to pictures here. For more detail images, go to the Noh Wear kitty cat hat set on flickr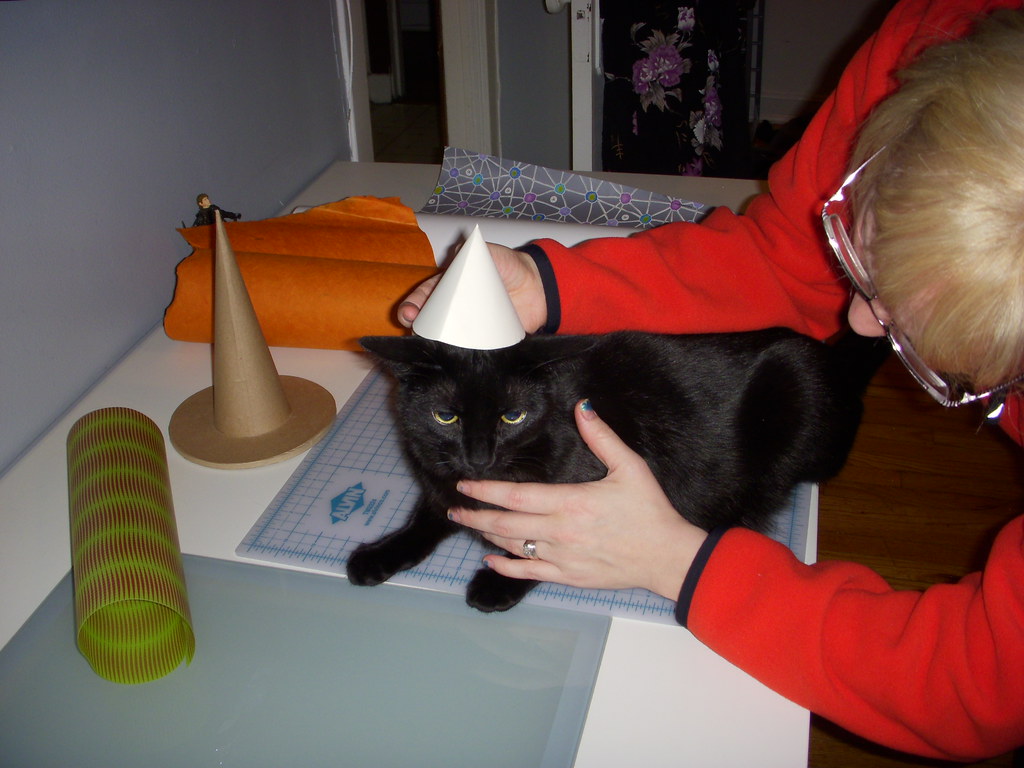
First do a test hat to see if your hat is the size you want. Use the round object to trace a circle on the plain white paper. Cut it out, fold in half then half again. Cut down one of the quarter bends. Twist it into a cone and see if it fits your pet.
You'll actually probably only use half the circle, but I like to test with the full one. If it doesn't fit or you don't like it, find a larger round object to trace and try it again.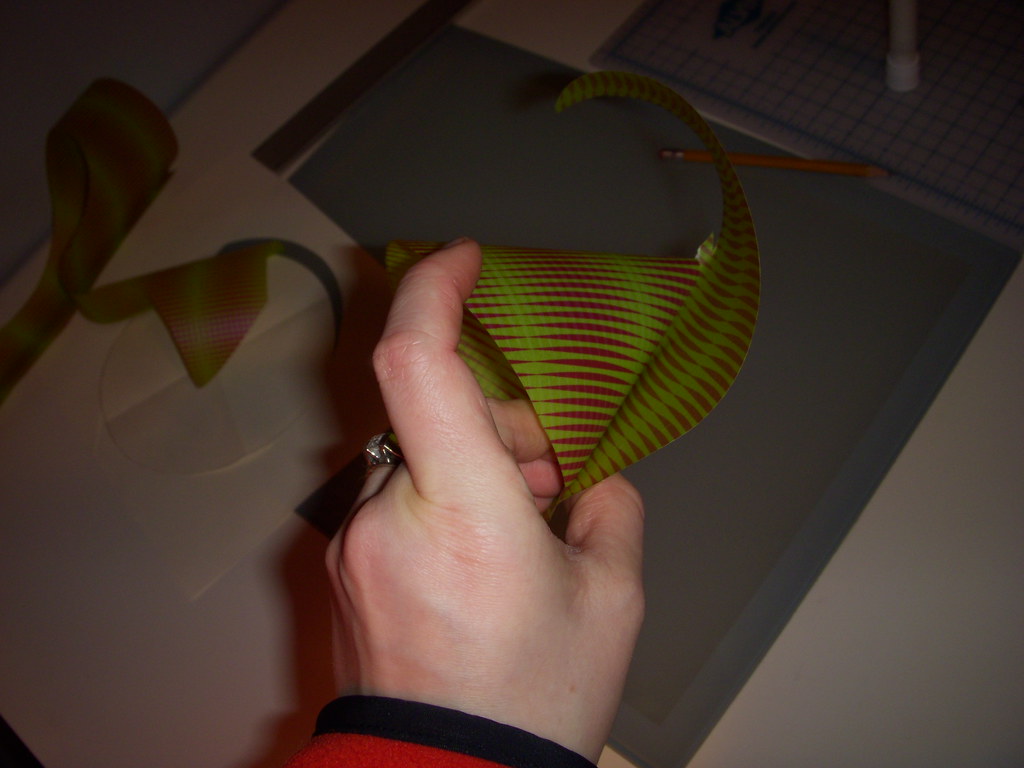 If it's good, repeat it all on the decorative paper. Be sure to trace on the side you want inside, just in case so no pencil lines show on the outside. Glue down the sides and trim off any excess paper. You might need to use a touch more glue after you trim it.
Cut two pieces of raffia. One about 3 inches long, the other about 1.5 - 2 feet long. Fold the long one in half and in half again, repeat until it's about 4 inches long. Tie it off in the center using the shorter one. You'll want to use a double or triple knot (this will keep the tassel from pulling through the top of the hat).  Feed all the folded pieces of raffia through the top of the hat. If the top isn't big enough you can snip off the very tip of the cone but don't do it too far or the tassel will pull through. It should be hard to fiddle them through and it will get harder the more that are through. I used my pencil to help feed them through (tweezers or even the end of a small paint brush will work).
After they're all through, cut at the center bend of each fold. I like to use raffia because the strands can be un-rolled and then torn into long strands creating even more tassels.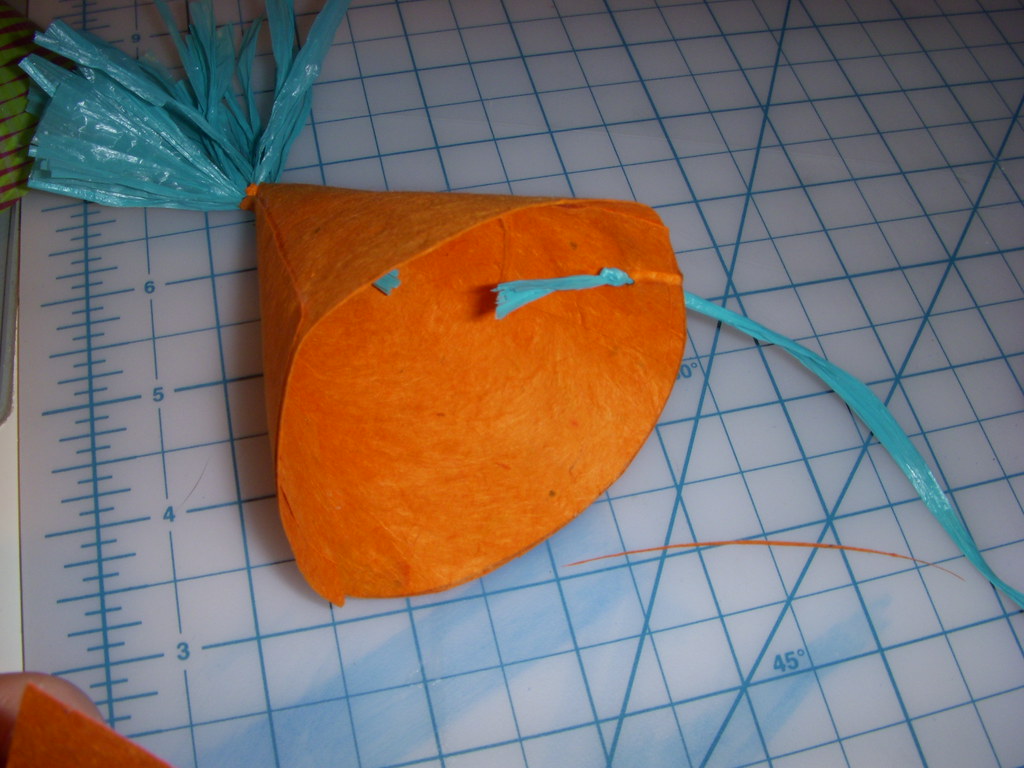 Using some of the same decorative scrap paper. Cut 3 small squares, about an inch or a little less each. Punch a small hole using your sharp pencil on the inside of the hat where the edges of the hat over lap. Do this as centered as possible within the overlap just about a 1/2 inch from the bottom. Glue one square on the inside and use your pencil to continue the hole through this paper. Cut another length of raffia about 6 inches. Feed the raffia through the hole, tie a double knot on the inside of the hat and glue the second square on top of the end of the knot. (
You can glue first then try to poke the hole though, but I found that depending on the paper, 3 layers might be too much to get through without wrinkling the hat.)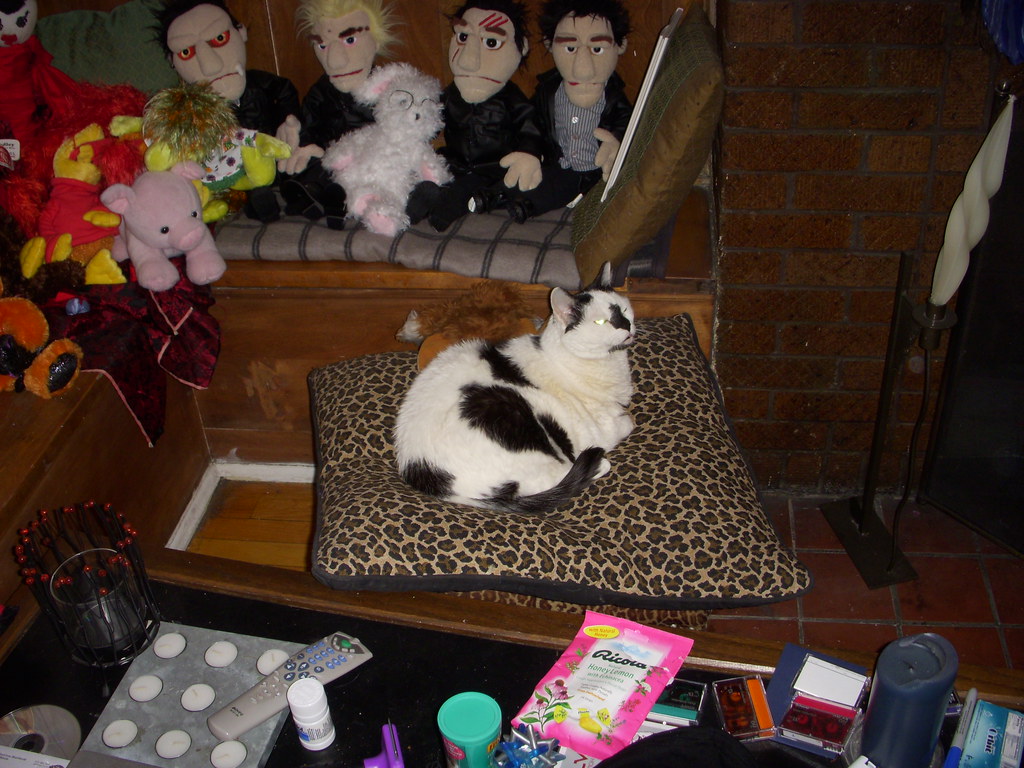 At this point, you need to hurry up, the kitties know somethings up and are anxiously waiting to see what you're going to do. And try not to get mad at the little one who keeps running off with the paper scraps.
Find where the second hole should go, opposite of the first. Glue the third square down and poke a hole through it for the other end of the raffia. Feed the other end of the raffia through from outside in. Don't tighten it and don't tie a knot. If for some reason something happened, (kitties might freak out!) you want it to be able to come off easily.
Then find your target. Put the hat on his/her head (I found over-an-ear works best) and the raffia under his chin. Pull the raffia so it tightens up enough to hold but not choke your kitty. I did a simple tie, like the first part of tying your shoes - no knots, before tucking the end under the hat.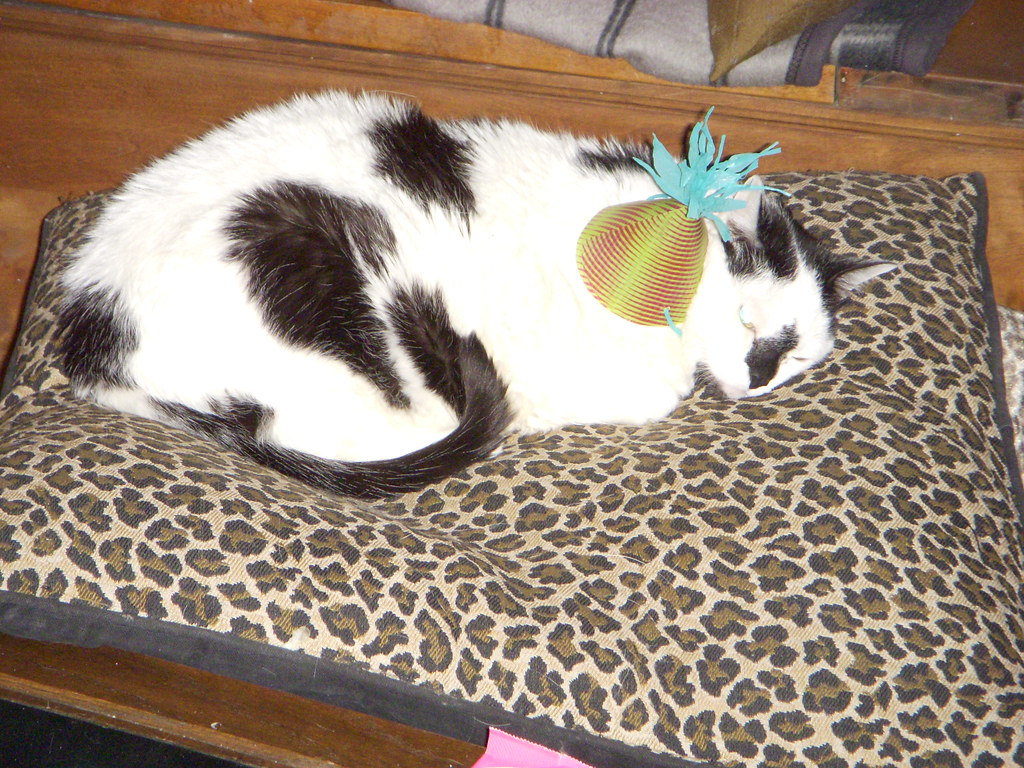
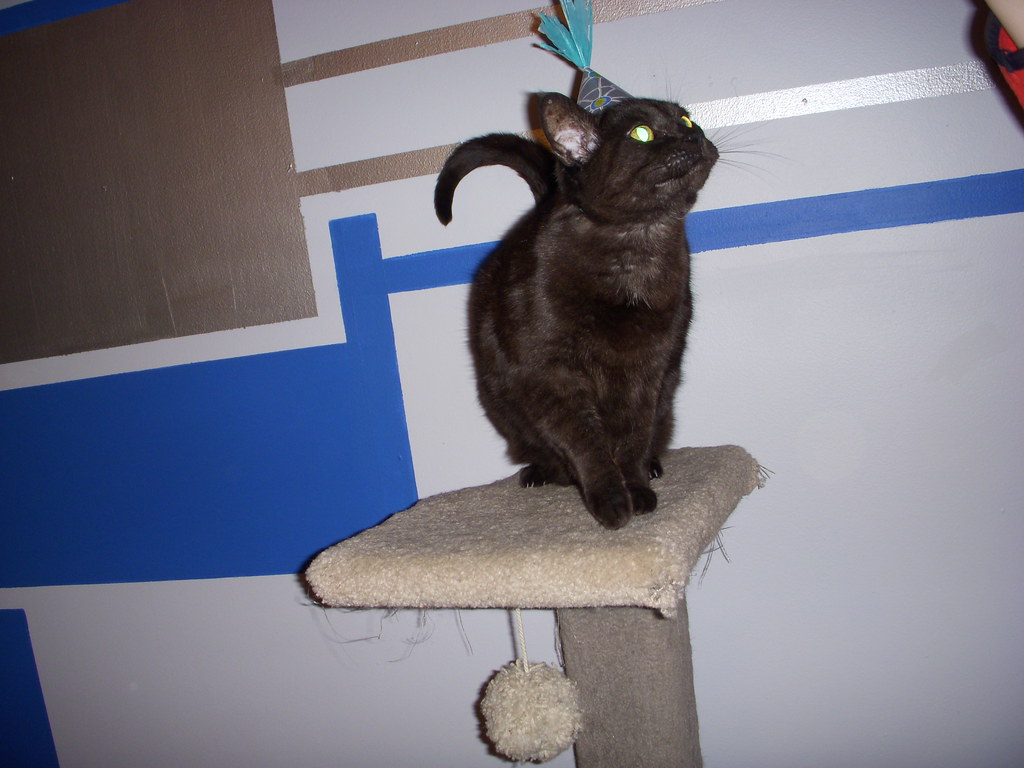
Obviously you can see how thrilled they all are.
i can has cake now?
Monday, March 3, 2008
Offbeat Bride
Whether you're getting married or not, take a peek over at Offbeat Bride. Ariel provides great advice for ladies walking down the not so typical aisle. I ended up doing a guest blog there about dreads in weddings.
Wednesday, February 27, 2008
The biggest thing this blog is going to do for me is to make me better document what I've done. I am absolutely horrible at getting good photos of my work. With that I'd love to say I have this stupendous reason for why I've chosen to start where I have, but I don't. The reality is, I didn't want to end up sitting around not doing anything while I attempt to scrounge up some photos of things. These were at hand and I don't have to put my husband out while he's still recovering from last weeks sickness.
So without further ado, my living room!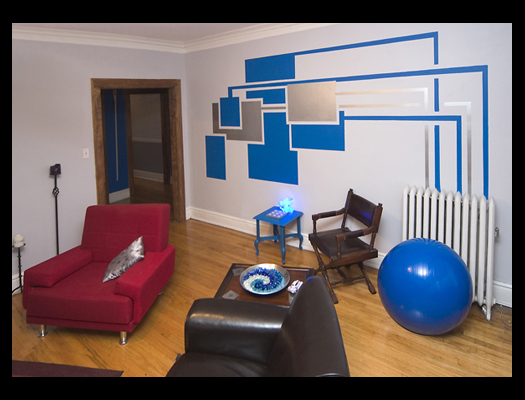 One of the too-many-to-name jobs I've held over the years was to solder circuits onto boards for a nanotech company in Chicago. Scary, yes, and I hope none of the boards I worked on were actually used in NASA equipment, but that's what I was told they were for. I have long since had an affinity for circuit boards which I'm sure is apparent when looking at my living room wall.
In order to achieve this I started by painting the entire room a soft light gray. Next I taped off the squares that I wanted, noting which ones should be which color and then taped off the circuit lines to them from the radiator. The blue is this fantastic latex paint I got at Home Depot and the silver is meant to be a wash paint that I used as a solid. Surprisingly the blue turned out to be the exact same color as the painters tape. I had a junky old table that had been painted an awful "woodish" brown that didn't match anything in my home so I painted it the same blue to match the walls. Following around the room, you'll see above the fireplace. This is also painted with the silver. The blue piece of art against the silver was made using a peacock blue dupioni silk attached to a thin piece of wood. I painted this with some silver and ripped gray dupioni silk into strips allowing them to remain ragged then glued them down into place to get a cresting wave affect. The window seat has a cushion made of the same blue dupioni silk.
The silver pillows on the red couch and chair I made using a silk brocade my parents brought back from China. The bowl on the end table is a silver hammered shallow bowl from Ikea. I filled it by placing glass rocks of blues and whites both clear and frosted into a swirl pattern, again to create a watery movement as a feature in the room. The drapes are white cotton from Ikea which I have future plans to attempt a dye project on. For lighting, yes, we really do use black lights as uplights behind the curtains. From outside it's a bizarre spooky look, but inside it's actually rather peaceful and isn't that harsh at all because of the way the curtains soften it and when regular lights are on they just create a simple soft hue. The pillow on the brown leather couch I made using a blue green and gold upholstery fabric and another gold-brown upholstery fabric. I hand beaded the center and the accent cross beads throughout the pillow.
And there you have it. Our beautiful living room which has already changed significantly but I'll show you updated photos once I finish getting all the new furniture sorted out, books put in their proper place and other such things.
Tuesday, February 26, 2008
Welcome!
Here it is. The official start of the Nohwear blog. With any luck I'll be able to update this blog as much as I do my personal LJ. So what exactly is the Nohwear blog all about? I'm creatively schizophrenic which results in a constantly messy home and too many things I've made. Luckily none of this kept my husband from marrying me, lucky for me that is, probably unlucky for him. Nohwear is about my projects, new and old, coming and going. It's what I do and who I am.
To begin with I'm going to be reviewing some of my past projects. So check back and maybe you'll see something you want to try or you'll want me to try.
So welcome. Make stuff. Know your wears.
Cheers!
Siouxzi

